

What baffles do
Baffles are internal vinyl walls stitched between the top and bottom skins. They control how the unit inflates and hold its shape. When a baffle seam fails, air redistributes and the unit deforms — a classic sign of a blown baffle.
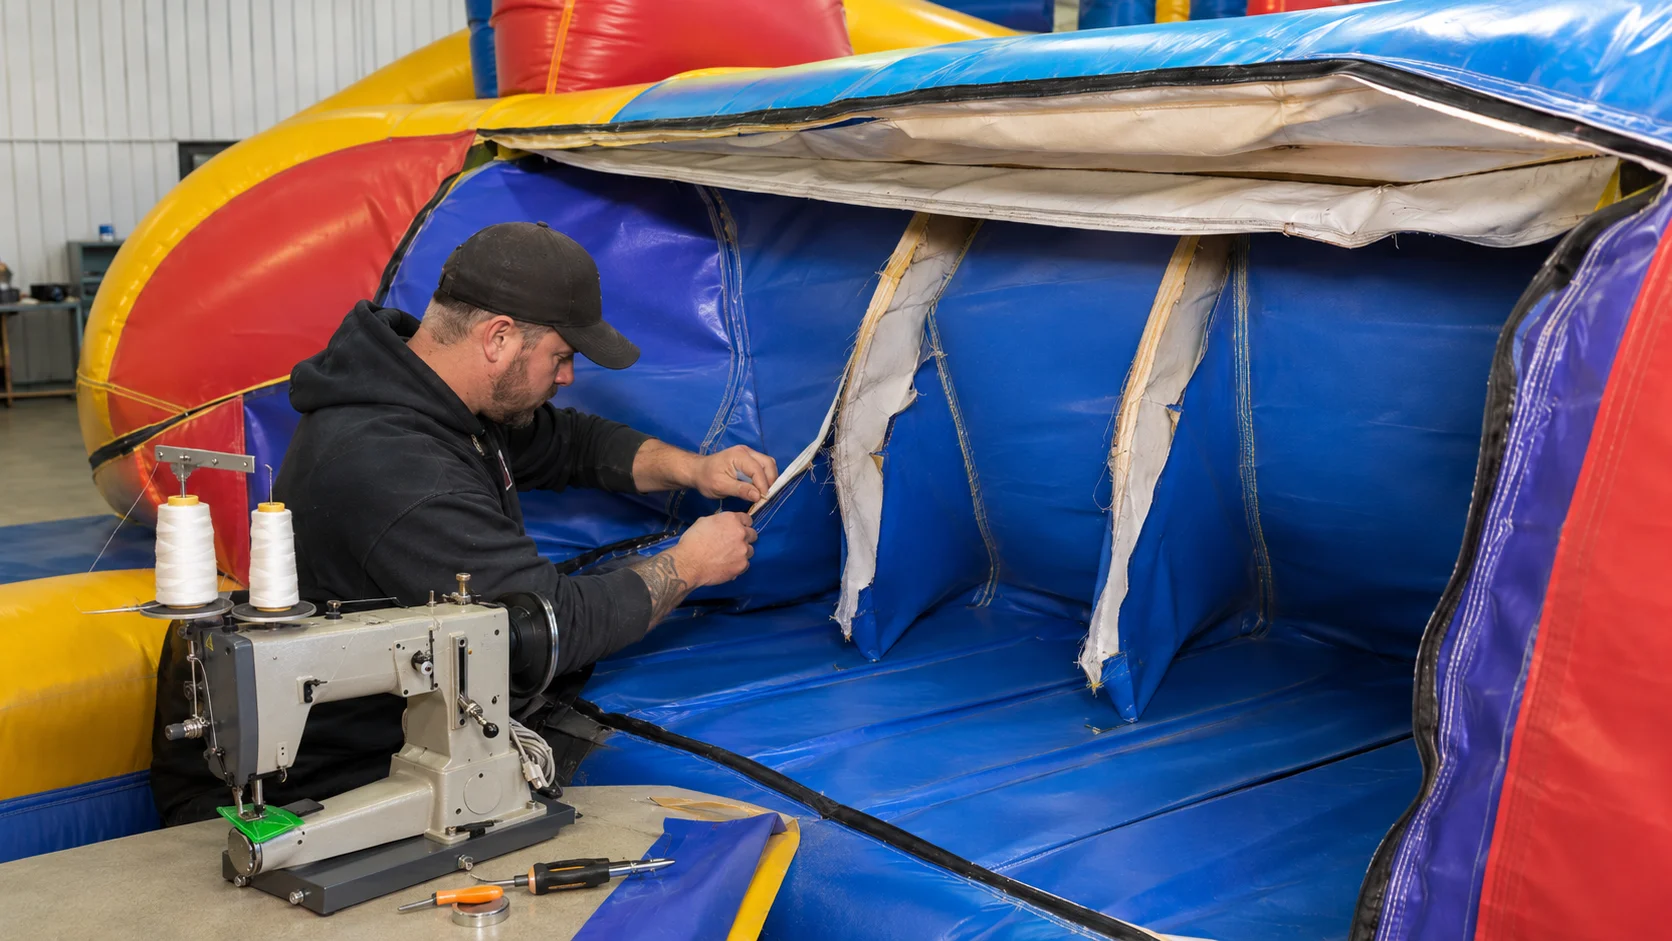
Baffles are internal vinyl walls stitched between the top and bottom skins. They control how the unit inflates and hold its shape. When a baffle seam fails, air redistributes and the unit deforms — a classic sign of a blown baffle.
The unit is still getting air but bulges in one area, sags in another, or loses its designed shape. Externally it may look fine — the failure is inside.
Because it involves opening the unit and working internally, baffle repair is where hands-on practice pays off most. Access is the hard part — you usually open an external seam to reach the internal wall.
The deformation is your map. Inflate the unit and study where it bulges and where it loses support.
Mark the problem area before deflating the unit. Once the inflatable is flat, the shape clue disappears.
The best access point is the one that lets you reach and control the failed internal seam while minimizing unnecessary opening of the outer unit. That often means opening an existing external seam near the damaged baffle.
Do not guess at a universal "correct access seam." Unit construction changes. Inflate and diagnose first, then choose the access point that gives you a workable path to the failure.
Before opening anything, mark orientation and take reference photos so the access seam and internal material go back in the correct position.
Baffle repair combines diagnosis, access planning, layered sewing, and closing a unit back up. The stitching is only one part of the job. The harder skill is learning how to reach the failure without creating a bigger repair than the original problem.
Locating, accessing, restitching, and closing up a failed internal baffle.
Inflate the unit, identify the shape change, and mark the area before deflation.
Locate an existing seam that provides workable access to the failed baffle. Open only the amount needed to control the repair.
Reach the internal wall, identify the failed stitch line, and bring the layers back into their original position.
Feed the failed layered area through the machine and follow the original construction. If a second stitch row is required, make a second pass. The portable machine stays on a stable repair setup; the material is brought to the machine.
Once the internal repair is complete, restore the external seam you opened and reinforce the access area when the construction or stress point calls for it.
Compare the repaired unit with the shape you observed before the repair. Inspect for continued bulging, sagging, pulling, separation, or a new deformation near the repair before returning the unit to service.
An internal wall that gives the unit its shape and controls inflation.
Yes — by accessing and restitching the failed internal seam, though it's more advanced than a surface repair.
Often a blown internal baffle redistributing the air.
A blown baffle is usually a failed internal stitched attachment. The repair requires access and structural restitching. It is not a surface-glue repair.
Re-inflate the unit to normal operating pressure, confirm the intended shape has returned, and inspect the repaired area for pulling, separation, or continued deformation before the unit returns to service.
Learn every inflatable repair — hands-on class, online course, and the machine that makes it possible.